In this post, I will give you exact instructions on how to start a WordPress blog for FREE on WordPress.com… but before you start, read this:
WordPress.com is a free blogging platform where you can submit your articles and posts for public. However porn, gambling and pharmacy related topics are not allowed.
That’s quite obvious, right? Many people tend to start their blogging hobby from there, but most of them quickly move on to personal domains and start using the self-hosted option.
Why so? Well, WordPress.com has way too many restrictions and it’s not wise to keep blogging on a sub-domain. Wait, what is a sub-domain?
In short, you are basically blogging for another website. In this case it would be WordPress.com and your blog URL/link address will also be part of WordPress domain.
Here are some examples of blogs hosted on WordPress.com:
- http://simpsons.wordpress.com/
- http://myblogging.wordpress.com/
How to Start a WordPress Blog on WordPress.com
The great thing is that it’s not a rocket science at all. There are five steps. All you need to do is go to WordPress.com and click start and it will help you setup your blog.
I’ll be doing this with you.
- First, choose a homepage layout
- Then, choose a theme
- Next, choose a domain (blog address/blog name)
- Pick a plan
- Create your account
Step 1. Choose A Homepage Layout
The first step is to choose a homepage layout for your blog. There are four possible options.
I would recommend “A list of my latest posts” because this is the most common format for a blog.
If you are a photographer or have really nice photos, then you should choose “a grid of my latest posts”.
For businesses, “a welcome page for my site” or “an online store” are most appropriate.

The First Step For Signing Up To WordPress Is To Choose A Layout
Step 2. Choose A Theme
A theme is what your blog looks like. Don’t worry – you can change the theme including the colors and pictures later!
If you pick something similar to what you’re looking for now, it will save you a little time down the road.

Theme Options
Step 3. Choose A Domain (Blog Address/Blog Name)
Unfortunately, it’s pretty difficult to find unique and somewhat catchy blog address on WordPress.com because most of them are already taken.
Here’s what I tried to get: Karen, Karen331, Karen222 – but they were all unavailable.
Finally, I was able to get myself registered but the blog name turned out pretty clumsy – karenevansweb.wordpress.com
Should I buy a domain name?
If you are considering buying your own domain, WordPress.com is not the best place to do it.
Don’t worry – you don’t have to buy a domain from WordPress in order to use their blogging software.
What blog name should I pick?
I suggest you to keep looking until you find something good. Take some time off and brainstorm with ideas and names. If you can’t decide, using your real name is fine.
Some of the most famous bloggers have their name in the domain, and you won’t be locked into writing about one topic.
Step 4. Pick A Plan

Once you have completed the basics steps above (including your blog name), you need to click on the “Select Free” button.
There is no need to use the paid version since it’s quite expensive and does not give you much advantages.
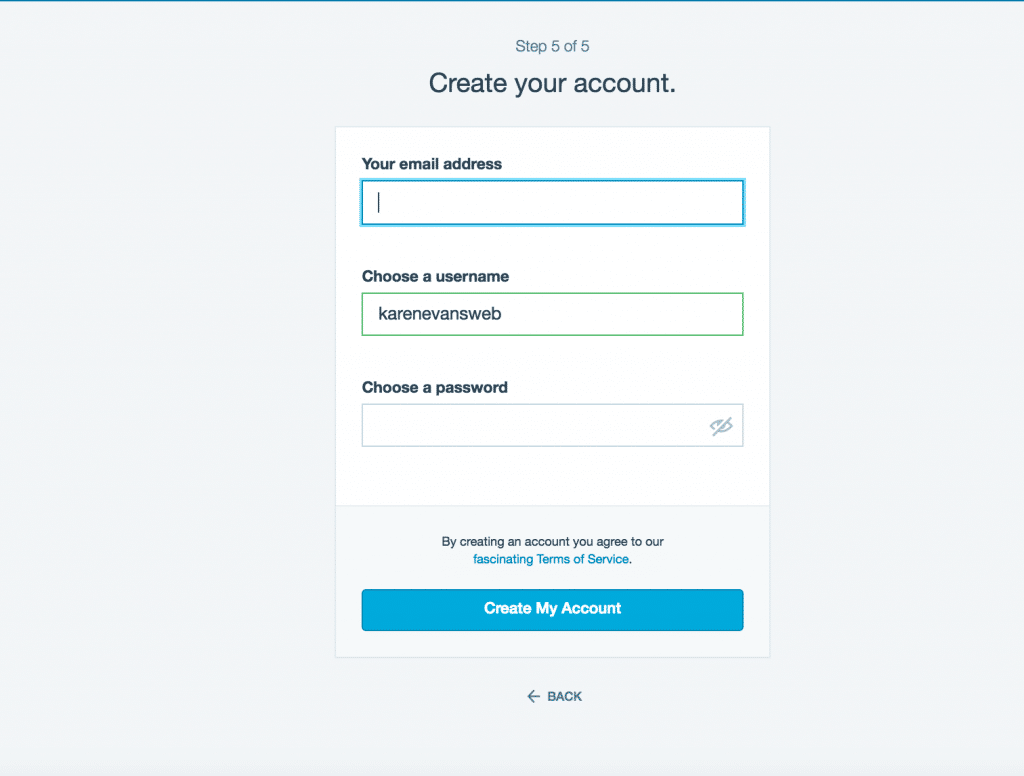
Step 5. Create your account

E-mail Address: That’s obviously the e-mail address you are using the most. In my case it would be Gmail account.
Username: Doesn’t really matter. I tried to use my personal name, but unfortunately it was taken. If your desirable username is not free, then add some numbers until it’s unique. Don’t worry, this will not be your blog name.
Password: Strong one! I suggest you to use special characters like “^^” or “(/&#” and different numbers. There are lots of ugly hackers trying to break into blogs lately.
How To log-in? A note on WordPress login
Now you are almost done! But before you can start blogging you need to verify your email address.
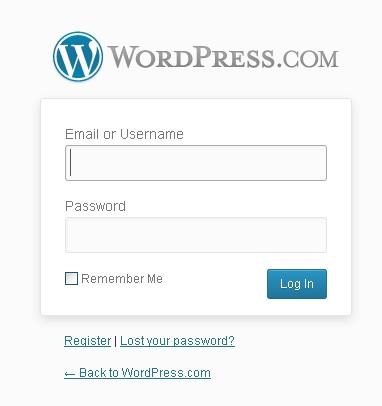
Simply head over to your mail and hit the “verify” link (it should appear in few seconds). Once you have done that, feel free to log in from http://wordpress.com/wp-admin
This is the log-in screen you should see:
Customizing your blog and creating your first post
Now log-in and let’s move forward. The WordPress dashboard is quite straightforward and user-friendly.
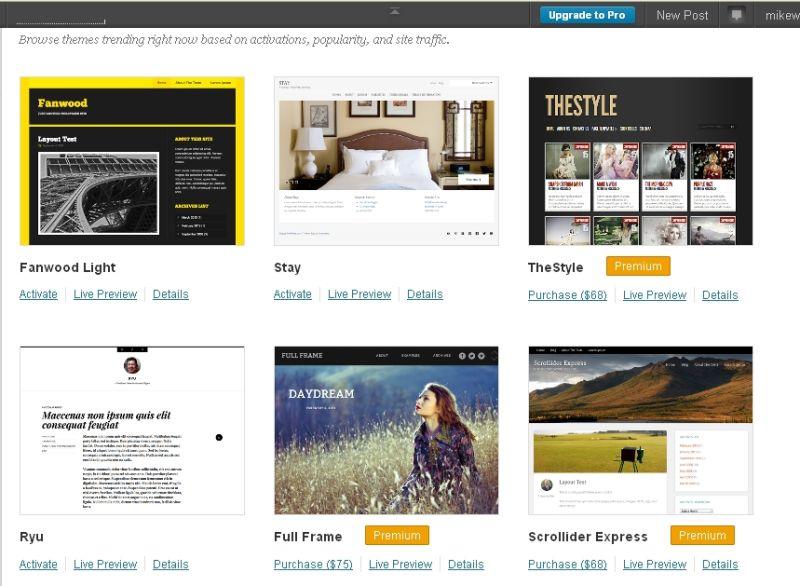
However, before you start blogging, you might want to change the theme – the design of your blog. You can do it by clicking on “Appearance” -> “Themes” (at the left sidebar).

As you can see, there are lots of different themes. Some of them are paid, some of them free. Don’t go crazy and buy a premium theme right away because the prices are quite high.
Start with a free theme and see how it goes. Keep in mind that you can change it whenever you want. Even 10 times a day if that’s your wish!
When I registered a blog on WordPress.com, I managed to found a pretty decent theme which is called “Truly Minimal“. It’s clean and neat and I personally love it.
It also fits pretty well to the overall blogging niche. To activate the theme, click on “active”. There’re more than 200 different themes to choose from so feel free to use other themes.
Adding new pages and blog posts
To create new posts and pages you have to use the dashboard options. For posting use “Post” -> “New” and for pages use “Page” -> “Add new”.
I usually don’t bother myself much with pages. In short, “pages” are usually your Contact or About me location while posts are your blogging posts. Quite simple, right?
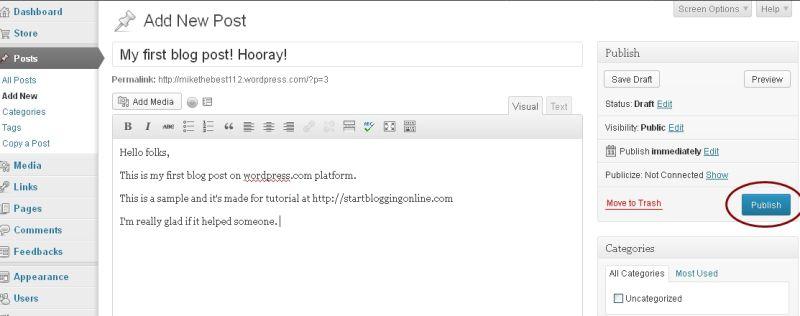
So let’s create first blog post and see how it goes. In order to do that, you have to click on “Post” and then on the “Add new”.
Here’s an example of my first blog post (you need to click on “Publish” to make it live).

After you hit the Publish button, you can add some “tags” to make it more “searchable”. In other words, if you add some tags, it’s easier to find your blog from the search engines.
However, don’t be too excited since new blogs won’t get much traffic at first. You have to promote it, share it with your friends, colleagues and use Twitter/Facebook etc.
Now You Know How to Start a WordPress Blog
As you can see, it wasn’t difficult at all. In fact, it only took me 4 minutes and 52 seconds. I hope you know how to start a WordPress blog yourself now.
If you decide to create your blog on your personal domain, then feel free to share them via comments below.


No comments:
Post a Comment